Download our e-book of Introduction To Python
Related Blog
Matplotlib - Subplot2grid() FunctionDiscuss Microsoft Cognitive ToolkitMatplotlib - Working with ImagesMatplotlib - PyLab moduleMatplotlib - Working With TextMatplotlib - Setting Ticks and Tick LabelsCNTK - Creating First Neural NetworkMatplotlib - MultiplotsMatplotlib - Quiver PlotPython - Chunks and Chinks View More
Top Discussion
How can I write Python code to change a date string from "mm/dd/yy hh: mm" format to "YYYY-MM-DD HH: mm" format? Which sorting technique is used by sort() and sorted() functions of python? How to use Enum in python? Can you please help me with this error? I was just selecting some random columns from the diabetes dataset of sklearn. Decision tree is a classification algo...How can it be applied to load diabetes dataset which has DV continuous Objects in Python are mutable or immutable? How can unclassified data in a dataset be effectively managed when utilizing a decision tree-based classification model in Python? How to leave/exit/deactivate a Python virtualenvironment Join Discussion
Top Courses
Webinars
Web Scraping - Processing Images and Videos

Nishant Rathi
3 years ago

Table of Content
- What is web scraping?
- Introduction
- How to get Media Content from Web Page using Python
- Extracting Filename from URL
- Information about Type of Content from URL
- Generating Thumbnail for Images
- Screenshot from Website
- Thumbnail Generation for Video
- Ripping an MP4 video to an MP3
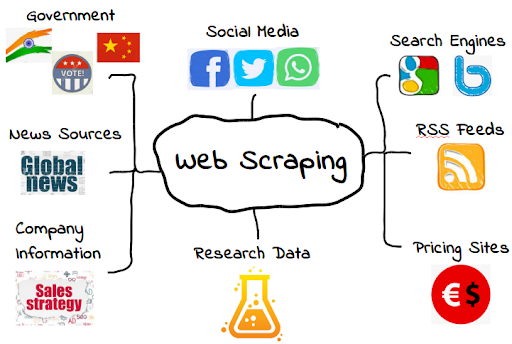
Let’s first try to know what is web scraping?
In theory, web scraping is the practice of
gathering data through any means other
than a program interacting with an API (or,
obviously, through a human using a web
browser). This is most commonly accomplished
by writing an automated program
that queries a web server, requests data
(usually in the form of the HTML and other
files that comprise web pages), and then
parses that data to extract needed information.
So basically, Web
scraping is a process of downloading, storing, and processing web content.
In this article, let us understand
how to process the content downloaded from the web.
Introduction
The web media
content that we obtain during scraping can be images, audio, and video files, in
the form of non-web pages as well as data files. But, can we trust the
downloaded data especially on the extension of data we are going to download
and store in our computer memory? This makes it essential to know about the
type of data we are going to store locally.
How to get Media Content from Web Page using Python
In this section, we are going to
learn how we can download media content which correctly represents the media
type based on the information from web server. We can do it with the help of
Python requests module as we did in previous chapter.
The first step, we need to import necessary
Python modules −
import requests
It will import
the requests package of python which is basically used for web scrapping
Now in the next
step, we provide the URL of the web page from where we want to download and
store data locally.
URL =
"https://authoraditiagarwal.com/wpcontent/uploads/2018/05/MetaSlider_ThinkBig-1080x180.jpg"
We create HTTP
response object using following code:
r = requests.get(URL)
With the help of below
line of code, we can save the received content as .png file.
with
open("ThinkBig.png",'wb') as f:
f.write(r.content)
After running the
above Python script, we will get a file named ThinkBig.png, which would have
the downloaded image.
Extracting Filename from URL
After downloading
the content from a web page, we also want to save it in a file with a file name
found in the URL. But we can also check if numbers of additional fragments
exist in URL too. For this, we need to find the actual filename from the URL.
With the help of
following Python script, using urlparse, we can extract the filename from URL −
import urllib3 import os url =
"https://authoraditiagarwal.com/wpcontent/uploads/2018/05/MetaSlider_ThinkBig-1080x180.jpg"
a = urlparse(url)
a.path
Now you can see
the output as shown below −
‘MetaSlider_ThinkBig-1080x180.jpg'
Once we run the
above script, we will get the filename from URL.
Information about Type of Content from URL
While extracting
the contents from web server, by GET request, we can also check its information
provided by the web server. With the help of following Python script, we can
determine what web server means with the type of the content −
First, we need to
import necessary Python modules as follows −
import requests
Now, we need to
provide the URL of the web page we want to download and save locally.
URL=
"https://authoraditiagarwal.com/wpcontent/uploads/2018/05/MetaSlider_ThinkBig-1080x180.jpg"
Following line of
code will create HTTP response object.
r = requests.get(URL,
allow_redirects=true)
Now, we can get
what type of information about content can be provided by web server.
for headers in r.headers:
print(headers)
we can observe
the output as shown below −
Date Server
Upgrade Connection
Last-Modified
Accept-Ranges
Content-Length
Keep-Alive
Content-Type
With the help of
following line of code, we can get the particular information about content
type, say content-type −
print (r.headers.get('content-type'))
We can observe
the output as shown below −
image/jpeg
With the help of
following line of code, we can get the particular information about content
type, say EType −
print (r.headers.get('ETag'))
We can observe
the output as shown below −
We can observe
the output as shown below −
none
Now let’s observe
the below command −
print (r.headers.get('content-length'))
we can observe
the output as shown below −
12636
With the help of
following line of code, we can get the particular information about content
To get the
particular information about the content type, say Server –
we can do it as
follows
print (r.headers.get('Server'))
So we can observe
the below output which provide the server type−
Apache
Generating Thumbnail for Images
Thumbnail is a
very small description or representation. A user may want to save only
thumbnail of a large image or save both the image as well as thumbnail.
Now in this section we are going to create a
thumbnail of the image named ThinkBig.png downloaded in the previous section “How
to get Media Content from Web Page using Python”.
For this Python
script, we need to install Python library named Pillow.
What is Pillow?
It is one of the
python packages which is a fork of the Python Image library having useful
functions for manipulating images.
It can be
installed as −
pip install pillow
The following
Python script will create a thumbnail of the image and will save it to the
current directory by prefixing thumbnail file with Th_
import glob from PIL
import Image
for infile in
glob.glob("ThinkBig.png"):
img =
Image.open(infile)
img.thumbnail((128,
128), Image.ANTIALIAS)
if
infile[0:2] != "Th_":
img.save("Th_"
+ infile, "png")
You can
understand the above code very easily and you can check for the thumbnail file
in your current directory.
Screenshot from Website
In web scraping, one
of the very common tasks is to take screenshot of a website.
For implementing
this, we are going to use selenium and webdriver.
The following
Python script will take the screenshot from the website and will save it to current
directory.
From selenium import webdriver
path = r'C:\\Users\\neha\\Desktop\\Chromedriver'
browser =
webdriver.Chrome(executable_path = path) browser.get('https://tutorialspoint.com/')
screenshot =
browser.save_screenshot('screenshot.png')
browser.quit
You can observe
the output as shown below −
DevTools listening on ws://127.0.0.1:1456/devtools/browser/488ed704-9f1b-44f0- a571-892dc4c90eb7 >After running the
script, you can check your current directory for screenshot.png file.
Image The block cannot
be displayed correctly.
Thumbnail Generation for Video
Now suppose we
have downloaded videos from a website and wanted to generate thumbnails for them
so that a specific video, based on its thumbnail, can be clicked.
For generating
thumbnail for videos, we need a simple tool called ffmpeg which can be
downloaded from www.ffmpeg.org. After downloading, we need to install it as per
the specifications of our OS.
The following
Python script will generate a thumbnail of the video and will save it to our
local directory −
import subprocess
 video_MP4_file = “C:\Users\neha\desktop\solar.mp4”
thumbnail_image_file =
'thumbnail_solar_video.jpg'
subprocess.call(['ffmpeg', '-i',
video_MP4_file, '-ss', '00:00:20.000', '- vframes', '1', thumbnail_image_file,
"-y"])
After running the
above script, we will get the thumbnail named thumbnail_solar_video.jpg saved
in our local directory.
Ripping an MP4 video to an MP3
Suppose we have
downloaded some videos file from a website, but we only need audio from that
file to serve our purpose, then it can be done in Python with the help of
Python library called moviepy which can be installed with the help of following
command −
pip install moviepy
Now, after
successfully installing moviepy with the help of following script we can convert
and MP4 to MP3.
import moviepy.editor as mp
clip =
mp.VideoFileClip(r"C:\Users\gaurav\Desktop\1234.mp4")
clip.audio.write_audiofile("movie_audio.mp3")
We can observe
the output as shown below −
[MoviePy] Writing audio in movie_audio.mp3 100%|¦¦¦¦¦¦¦¦¦¦¦¦¦¦¦¦¦¦¦¦¦¦¦¦¦¦¦¦¦¦¦¦¦¦¦¦¦¦¦¦¦¦¦¦¦¦¦¦¦¦¦¦¦¦¦¦¦¦¦¦¦¦¦¦¦¦¦¦¦¦¦¦¦¦ ¦¦¦¦¦¦¦¦¦¦¦¦¦¦¦¦¦¦¦¦¦¦¦¦¦¦¦¦¦¦¦¦¦¦¦¦¦¦¦¦¦¦¦¦¦| 674/674 [00:01<00:00, 476.30it/s] [MoviePy] Done.It will save the
audio MP3 file in the your local directory.
Liked what you read? Then don’t break the spree. Visit our insideAIML blog page to read more awesome articles.
Or if you are into videos, then we have an amazing Youtube channel as well. Visit our InsideAIML Youtube Page to learn all about Artificial Intelligence, Deep Learning, Data Science and Machine Learning.
Keep Learning. Keep Growing